In today’s world, having a strong online presence is crucial for businesses. Facebook offers a great platform for creating apps, and it works well with WhatsApp, a popular messaging app used by billions of people worldwide. This blog will help businesses through the process of setting up WhatsApp Business API with Meta, allowing them to connect with a large audience easily.

Step 1: App Creation on Facebook
1.1 Visit the Developer Portal:
Visit the Developer Portal: Go to developers.facebook.com and log in to your account.
1.2 Create a New App:
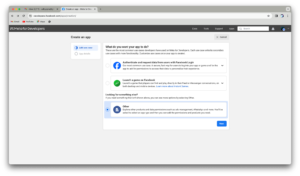
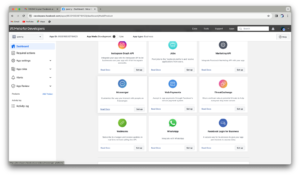
Navigate to Apps and then click on Create App and choose the appropriate use case. Choose other to explore diverse functionalities beyond standard options like Facebook Login or Gaming.
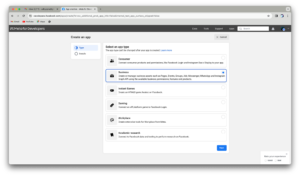
Select Business and click Next.
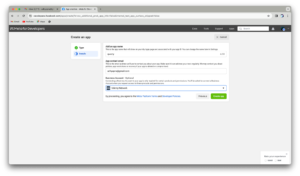
Fill app name and select business account(optional).
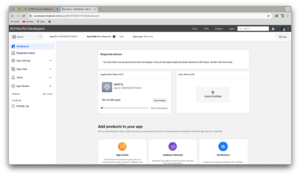
On clicking Create app you will be redirected to dashboard of created app.
1.3 Configure App Settings:
Configure the basic settings for your app, including privacy policy URL, terms of service URL, and app category.
1.4 Obtain App ID and Secret:
Once your app is created, navigate to the dashboard to find your App ID and App Secret. These credentials are crucial for integrating your app with WhatsApp business API.
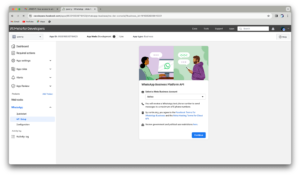
Step 2: Adding WhatsApp Products to App: WhatsApp business API
Navigate to your app dashboard on Facebook, find the Add Product button and select WhatsApp.
To proceed with the setup, you’ll need to create a Meta Business Account.
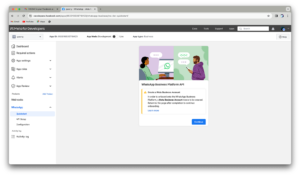
click continue and follow the steps to create your account.
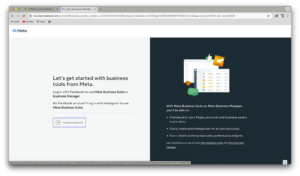
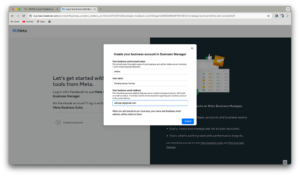
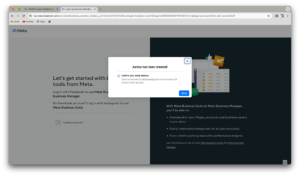
Click on Create Account and give your business a name, add your personal details, and provide a business email address. This step sets the stage for managing your business activities with Meta.
Once you’ve created your account, check your email for a confirmation message. Click the link provided to confirm your account. After confirming, return to the Meta Business Portal and click Done to start exploring.
Click Done to complete the previous step. This action opens the Developer Portal for further actions. Next, click Continue to proceed with integrating the WhatsApp product into your app.
After clicking Continue, you’ll land on the API Setup page for WhatsApp. Here, you’ll begin the integration process, setting the stage for smooth communication. Follow the instructions to configure the settings swiftly.

Next, add a recipient phone number to test the WhatsApp API using a temporary token. This step allows you to see how your digital creation interacts with real-world communication.

Click Send Message and await the notification in the bottom-right corner. This confirms the success of your communication test.

Navigate to the configuration section. Here we will set up a webhook to receive important events like messages. Create a permanent token to establish a strong presence.

Go to the webhooks section and select WhatsApp Business Account. create the link connecting your app to WhatsApp’s communication network.

Enter webhook and token, then click Verify and Save.

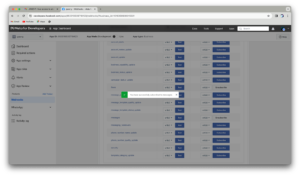
Once your app achieves verification status, you gain access to object fields that your webhook can subscribe to. Each field offers the option to both test and subscribe, empowering you to fine-tune your integration and tailor it to your specific needs. It’s time to explore and unlock the full potential of your WhatsApp Business API integration!
For assistance in creating your webhook, I recommend visiting the official documentation provided by WhatsApp Business API. They offer comprehensive guidance on how to set up webhooks, ensuring seamless integration with their platform. Simply follow the link provided: How to Use Webhooks from WhatsApp Business API
There, you’ll find detailed instructions and best practices to help you navigate the process successfully.

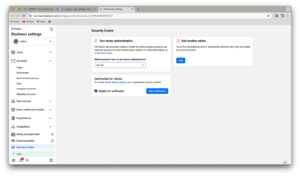
As indicated by the red alert in the image above, to receive logs, it’s imperative to transition your app from a testing environment to a live one. This pivotal step ensures that your app is fully operational and ready to receive and process logs effectively.

Toggle the switch to transition your app to live mode. Fill in basic details like a trailblazer, including a Privacy Policy and Terms of Service URL.

Though you can now receive logs and send template-based interactive messages, accessing Meta’s latest innovation, Flow, requires business verification.

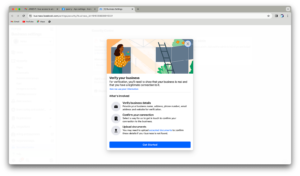
Click Start Verification to begin. You’ll be taken to the Meta Business Portal, where you’ll embark on verifying your business, unlocking a world of possibilities for your Whatsapp business API’s integration journey
To verify your business, prepare to provide essential details, including connections such as the founder or CEO’s profile and relevant documents. Upload these documents as instructed. If all proceeds smoothly, anticipate your business verification within a swift timeframe of 2–4 hours, with a maximum duration of 48 hours. Ready your documents and embark on this final step toward unlocking the full potential of your business integration!
Congratulations! You’ve completed the journey from crafting Meta to integrating WhatsApp business API products, setting up a business account, configuring webhooks, going live, and achieving business verification. Now, you’re ready to use Meta Flow on your verified business.
This post is written by our Software Engineer Pankaj Kumar Verma.
Related Articles
Power of React Lazy Loading for React Performance
React lazy loading defers the loading of non-essential components and assets…
Unleashing the Power of React Code Splitting
React code splitting improves page load times by splitting code into separate…
Power of useMemo and useCallback for React Performance
Learn how to optimize React apps with useMemo and useCallback hooks. Mastering…